Would you like to decorate another paper bag, let's get everything ready...

You will need:
- Your 'free' paper bag (we now have paper bags galore instead of the usual plastic ones),
- acrylic paint (any colour),
- small paint brush,
- a few drops of water,
- mixing bowl and plastic spoon,
- piece of cardboard to try out stamp,
- scissors,
- hole-punch,
- ribbons,
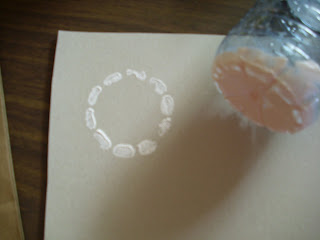
- something to print with, I used the bottom of an empty water bottle...
Are you ready, let's go...
Having mixed some of your acrylic paint into your mixing bowl, add a few drops of water and mix thoroughly with a spoon (not like I did with the brush as I got it too loaded with paint...I was in a rush to make a sample to take it to the centre while also trying to take photographs single-handed ~ talk of multi-tasking!)
Now load your brush with paint and paint the (outside of the) bottom of your water bottle...use several coats of paint to cover this area well...mine was super loaded LOL!
You can try stamping your design on a piece of cardboard first before stamping on your bag.
When you are confident that your design is looking good, start stamping on your bag. Do not overlap designs unless the first ones have dried. Use your imagination and enjoy your stamping. If you have something else you could stamp with, experiment...you will find there are loads of things around the house you could stamp with.
KIDS: Please ask an adult for permission to use whatever you have chosen as your stamp.
Do not overload your stamping medium so that you will get a uniform pattern...you can see I did just that except towards the right of the picture just to show the difference ;)
Once totally dry, use a punch to make holes along each edge of the bag.
Open the fold on one side and start threading your ribbon from one hole down to the next one along the side (not from front to back flaps as that will close up your bag).
Make a bow or tie...depending on whatever you choose to make, cut equal pieces of ribbon to complete this added feature.
Do the same all along each side, front and back.
And there you have it, another pretty recycled bag
Enjoy!


That's an excellent idea! Those gift bags you buy in the stores are so expensive. This makes a great gift back for practically no cost. Thanks for sharing.
ReplyDeleteTake care.
What a fantastic idea to use the bottom of the water bottle for a stamp.
ReplyDeleteTFS.
Hugs,
Sue.
Wow what a fantastic tutorial for a fun project and a great way to give a gift!!! I want to thank you so much for all your sweet comments and the blog award! I will pick it up as soon as I can! I'm swamped under right now, both in my new DTwork and personally with the loss of a dear friend and all the details for that this week. I hope next week will be much calmer! :)
ReplyDeleteWhat a cute and unusual bag! Very nice!
ReplyDeleteWhat an original way to make circle designs!!!
ReplyDeleteVery interesting.
ReplyDelete